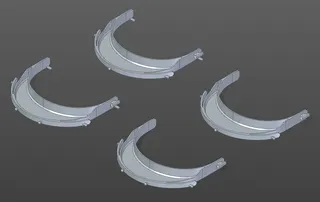
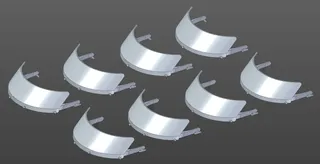
RC3 Compatible Face Shield for 0.8mm Nozzle
Description
PDFEXPERIMENTAL
I do not yet have a proper shield to test these parts with. I've made paper mock-ups from the Prusa RC2 shield template and all of the holes line up as they should, but I can't 100% confirm this design. Primarily, I would like to confirm that the lower reinforcement snaps into place nicely on a 0.020" / 0.5mm shield. If anyone has a printer with a 0.8mm nozzle and can get their hands on a shield to test this for me, I would greatly appreciate your feedback!
My goal with my RC2/RC3 remix was to take advantage of the high flow rate of large-diameter nozzles (larger than 0.4mm) to increase production speed. With this design and a print speed of 50mm/s, I can print a set of parts in ~45 minutes while maintaining the full 20mm headband height and the original Prusa strap hooks and shield mounting post layout. This design is intended to be completely cross-compatible with the original Prusa RC2/RC3 Face Shield.
VARIANTS:
Stiff/Flex:
The stiff models have consistent 2.88mm (3 perimeters) wall thickness. The flex models have 2.88mm wall thickness for the front strap and 1.92mm (2 perimeters) wall thickness everywhere else. I find the stiff models to be more comfortable because the arms of the headband better resist the tendency of the elastic strap to apply pressure to the sides of the wearer's head with the ends of the arms. Still, the flex models print faster and with less material, so I've included them.
Brim:
It is a common problem to have the arms of the headband lift off the print bed during printing, so I've added a small brim to each arm to help with bed adhesion on the "Brim" models. The brim can be trimmed off with flush cutters.
DESIGN REASONING:
All wall thicknesses are multiples of the 0.96 extrusion width. This means that all of the walls (minus the intersections) are printed with 2 or 3 straight perimeter passes. Because the extrusion is so wide, we can safely disable infill and rely on perimeters to fill the thicker spots. This eliminates the slow zigzag motions required by rectilinear infill. Additionally, the front strap has been trimmed down to a height of 10cm since the extra material there is not strictly necessary.
Print instructions
I use Simplify3D for slicing, so the settings below are organized as they are in Simplify's profile system. These settings should translate to any slicer, though they may be named and/or organized differently.
CRITICAL PRINT SETTINGS:
Extruder:
Nozzle Diameter: 0.8mm
Extrusion Width: 0.96mm
Layer:
Primary Layer Height: 0.6mm
Outline/Perimeter Shells: 3
Infill:
Interior Fill Percentage: 0% ;(Infill disabled)
External Fill Pattern: Concentric
Support:
Generate Support Material: disabled ;(Supports disabled)
Advanced:
External Thin Wall Type: Allow single extrusion walls
Internal Thin Wall Type: Allow single extrusion fill
I'm still fiddling with the remaining settings for PETG; I may come back and update this with an optional settings list if I get a profile tuned in nicely.
Tags
Model origin
The author remixed this model.


