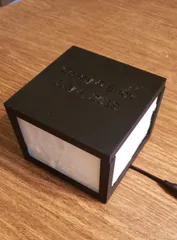
MMU2s Filament Buffer LACK Mount
Description
PDFI needed a way to mount the Filament Buffer for the Prusa MMU2s. I started with the existing "s-buffer-spacer" stl from Prusa (https://www.prusa3d.com/prusa-i3-printable-parts/) and came up with this mounting plate for the side of an Ikea LACK enclosure.
Combined with the top-side mounted MMU (easy access), and vertigo235's "Prusa MMU2 PTFE Holder M10 Passthrough Adapter" https://www.thingiverse.com/thing:3233579, it makes the LACK very functional. [See photos - click on last photo to zoom out and see how this work with top-side mounted MMU. Still getting the hang of how prusaprinters.org handles images...]
Print instructions
Print 2, one for each side of the buffer.
This is a work in progress
I wanted to make this part printable without any supports. The "top" of the "keyhole" is still not perfect and I'm working on alternatives, but it was close enough for me to use. I suggest you slow down the print as you get to the "bridge to nowhere".
Post-Printing
After you print the part, remove the built-in support tab. See photos. It should break off easily.
How I Designed This
This was my first attempt to use OpenSCAD. I imported the Prusa s-buffer-spacer component and made the following modifications:
-extended the "teeth" on the columns so they would reach the build plate when oriented face-down.
-Added the mounting plate with screw "keyhole". This area still needs work.
Odds are this will a troublesome spot to print. I am considering a few alternatives for a future version. If necessary, slow the print down when you get to the "top" of the smaller holes.
In order to print without any slicer generated supports, I added a built-in support tab.
What you see in the photos are the second and third attempts at printing these parts. I was presently surprised how well they turned out - I half expected a mess at the keyhole in the support plate but it was good enough to use and mount!
Tags
Model origin
The author hasn't provided the model origin yet.


