X-axis Tensioner to avoid forces on Z-axis
Description
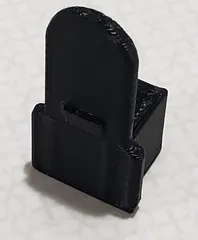
PDFThis remix allows you to tension the belt without putting the tension in the belt back through the z-axis linear guides. The tension in the belt becomes a compression force on the x-axis linear guides through the two screws that thread into small nuts pressed into the plate on the end of the axis.
Note: Tensioner.step is the same as Y-Yoke.stl
You will also need:
3mm screws x3
3mm nuts x3
3mm washer x1
3-5mm drill bit (and a tool to run it in)
The bearings, screw, and nut from the original set up on the printer.
Print Settings
Printer:
FolgerTech 2020 i3
Rafts:
No
Supports:
No
Resolution:
.2mm
Infill:
20%
Post-Printing
Step 1
Press the 3mm nuts into the hexagonal depressions in the plate
Step 2
Drill two holes in the end of the x-axis in line with the x-axis linear rods. It is helpful to have these slightly oversized.
Step 3
Remove current idler pulley from x-axis on printer, reassemble in yoke.
Step 4
Press a 3mm nut into the slot in the y-yoke.
Step 5
Assemble the plate and the yoke inside the current end of the x-axis.
Step 6
Tighten the outside screws evenly until they press against the ends of the x-axis linear rods. Tighten the middle screw to pull the x-axis belt tight. Tighten all 3 screws as needed.
How I Designed This
Remembering the issues I had the first time I tried to get the x-axis belt tight enough, I wanted a way to have a framework that held the x-axis at a constant width no matter how tight I pulled the belt. I started with trying to use some threaded rod, but pretty quickly while looking at other solutions, I noticed that by making the plate in most of the tensioners a little longer, I could turn the linear rods into that framework by drilling a couple holes.
Category: 3D Printer Parts
Tags
Model origin
The author marked this model as their own original creation. Imported from Thingiverse.


