Tablet and Notebook Stand

Description
PDFUpdates:
- (04.12.2022) Added versions for the screw and nut with more tolerance.
Tablet and Notebook Stand
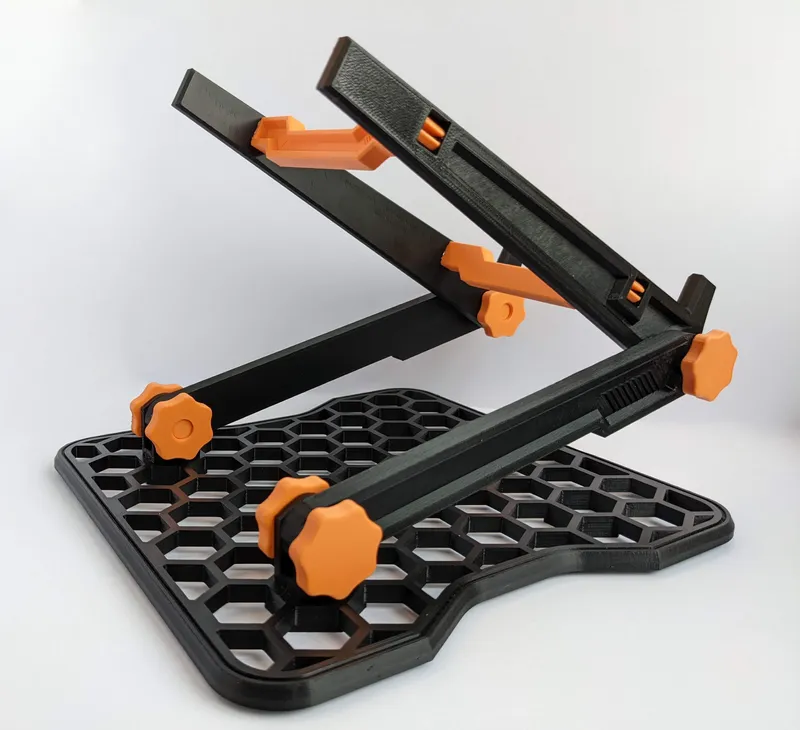
Looking for something to spice up your home office? This laptopstand will become your new holding assistant. It supports lightweight laptops, tablets or even books (if you still use those). The adaptable stand lets you adjust the height and the tilt to fit your needs perfectly. Also it is 100% 3D printed (no additional hardware needed) and you won’t need any tools for assembly. Make sure to not overload the stand otherwise the tilting mechanism will collapse. It's only plastic after all ;)
So take a look at the stand and print it out for your ideal ergonomic workstation!
What to Print
- 1 x Baseplate
- 2 x Bracket
- 1 x Base arm
- 1 x Base arm -mir
- 1 x Holding arm
- 1 x Holding arm -mir
- 4 x Screw
- 4 x Nut
- 2 x Connecting Beam
How to Print
Use PLA to print the stand. If you like you can use two colors as shown in the pictures. All parts should lay in the right orientation when you open them in your slicer. I use Prusaments Jet Black and Orange PLA.
People commented that the srews were to tight. Therefore I added a second version (_increasedTolerance) for the screw and the nut.
Base color:
Baseplate:
- 0,2 layer height
- 30% infill
- 3 contours
- rotate bridging to 45°
- no supports
Bracket:
- 0,15 layer height
- 100% infill
- 3 contours
- no supports
Arms:
- 0,15 layer height
- 60% infill
- 3 contours
- no supports
Accent color:
Nuts and screws:
- 0,15 layer height
- 100% infill
- 2 contours
- no supports
Connecting beam:
- 0,2 layer height
- 20-50% infill
- 2 contours
- no supports
How to assemble
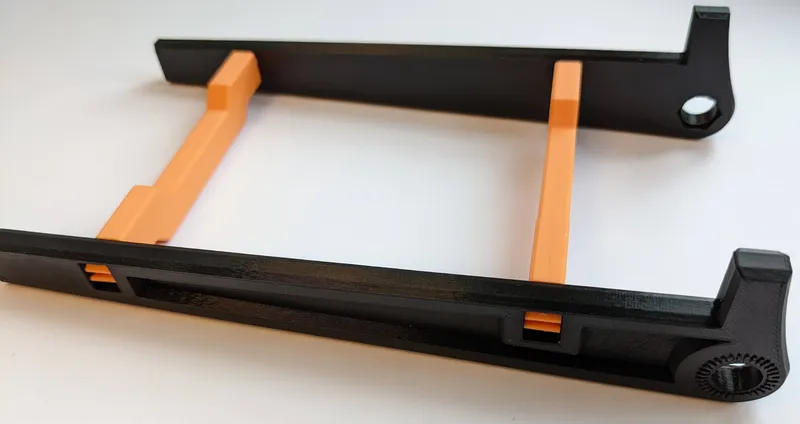
- As the first step of post processing free the hole in the base arms from support structures as shown in the pictures. Also tighten the nuts on the screws a few times to smooth them out.

- Insert the brackets into the baseplate with the hexagonal cutouts facing inwards. Careful, it is important you put them in facing the right direction, because it is nearly impossible to get them out again. Never happend to me, of course ;) Tip: Use the base arms to push them in as shown in the picture as you will need some force to do so.
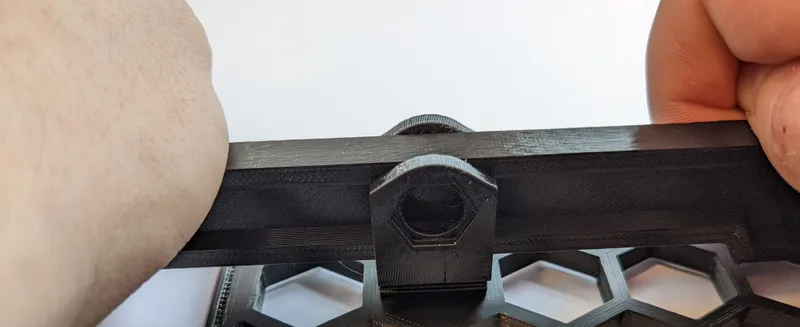
- Put the base plate aside and focus on the holding part. Connect the two holding arms with the two connecting beams. Careful, all four parts have a dip at full length and that should face outward. See the pictures for reference.
- Now get back to the baseplate and attach the base arms with their narrow end to the brackets with the screws. The dips have to be on the outside again and protrusion should face the base. On the inside of the brackets is a hexagonal cutout so the nut is fixed on that side. You can also glue it on. Make sure not to get any glue on the threads.
- Now connect the holding arms with the base arms also with screws the same way. Make sure the hooks face upwards.
- Optional: Use felt cutouts or print something from flex to cover the four hexagonal feet for protection.
If anything is unclear you can reference the include .stp-file of the whole assembly.
How to use it
By loosening and tightening the screws (the nut can stay fixed) you can adjust the angle between the holding arms, the base arms and the base. That is how you can adjust the height and tilt of your stand. Enjoy!
Final thoughts
I hope you like the stand and you find it useful. Let me know if you have any suggestions or ideas for further improvement. Also let me see your makes! Let me know if you are interested in a stand for heavier laptops.
Happy printing!
Tags
Model origin
The author marked this model as their own original creation.