Ceiling Mount for Green Screen / Projector Screen
Description
PDFA note about the wall-hook competition: A ceiling is like a wall when you're laying down! :D
I was dissatisfied with the way my new green-screen was supposed to be attached to the ceiling. They suggested using chains, and because of my low ceiling, that would mean knocking into it quite often!
To solve this, I created a way to fasten these screens directly to the ceiling in a secure and removable manner.

Design Considerations
The hole pattern allows it to be fastened directly into the beams in my ceiling. Since my beams were wider apart than the screen itself, I wanted to bring the mounting holes outwards so I could attach the bracket directly to the wooden beams in my ceiling. I do not recommend hanging things from the ceiling only from drywall material.

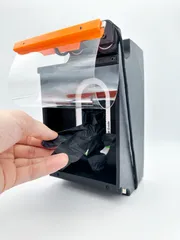
I feel pretty clever about the mechanism to connect the screen to the bracket. There is no need to modify the screen, it simply seats in and is fastened with captured zip-ties! This allows for easy removal and secure attachment.


Print Instructions
The part was designed to print without supports and in this orientation:

Here is the Green-Screen I purchased for this project: https://smile.amazon.com/gp/product/B088W8C5DG/
Installation instructions:
Disclaimer: Use and Install this bracket at your own risk. I am not responsible for any damages or injury. Modification of your building and use of tools always includes risk.
- Use a stud finder to find the beams in your ceiling.
- Attach the Green screen to the brackets using long zip ties.
- Have somebody hold the screen/brackets assembly to the ceiling and mark the holes for drilling. Make sure the holes will hit the beams in the ceiling so the screen is structurally supported.
- Use substantial bolts to fasten the brackets to the wooden beams in the ceiling.
- Once both brackets are attached and aligned, cut the zip ties and mark the third hole (was obscured by the screen) for drilling. If this screw hits a beam, great. However, on my ceiling, it's just drywall material, so I just used a drywall fastener to get a little extra hold.
- Loosen and remove a previous bolt to let you drill/attach the drywall fastener to the third fastener point.
- Now, with all the holes drilled and prepared, you can securely mount both brackets completely.
- Insert new zip ties, slide the screen in, and synch it up tight!
If you get good use out of this, remember to post a make and maybe leave a tip! Enjoy!
Tags
Model origin
The author hasn't provided the model origin yet.


