RAMPS 1.4 case with mount for 80mm fan

Description
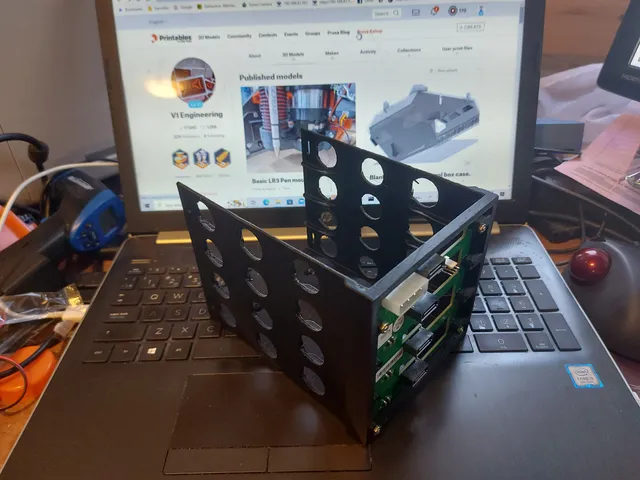
PDFCase with a mount for an Arduino Mega 2560 and RAMPS 1.4 shield. Openings for wires, supports for zip ties, and a mount for an 80mm cooling fan. Also accomodates an LCD/controller
edit: 02/12/2015 -- My initial upload had an older version of the sides, with the holes too far apart. I've also updated the top and bottom files to include an additional support at the edges for the bottom
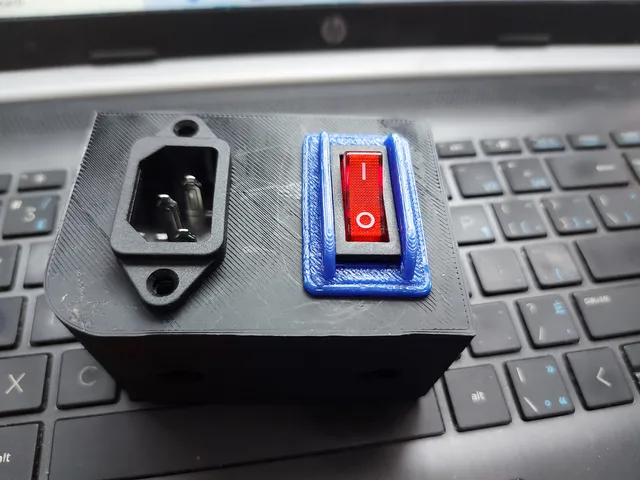
edit: 02/14/2015 -- Slight changes based on fitting the Arduino board to the front/back files, accomodating the power socket better, and I decided to make the holes for the screws after all, as drilling out the tiny holes is annoying. Motherboard mounting screws should work perfect.
Instructions
Assembly is with 16 3mm screws and nuts, 10mm should be adequate in length, up to 15mm should be fine. Assembly should be reasonably obvious. The holders are supposed to accomodate 5.5mm diameter nuts, however I'm using #4-32 screws since that's what I can buy cheaply at the hardware store, and those don't fit in the hex openings (But still work well.)
The Arduino Mega 2560 should screw down to the bottom of the case. Some drilling may be required, depending on the screws used. Max 10mm screw length. I recommend that a coarse thread screw be used, as there is no nut provision.
The fan should be able to be mounted to the inside of the case, but you will need screws longer than 10mm in order to reach, the fan will also probably have to be somewhat slim in order to leave clearance for the wiring inside the box. The current version, computer screws ought to work fine for this.
Edit 02/18/2015:
While assembling using the #4-40 screws, it occured to me that if I do not set the nuts in the top piece, it will be impossible to tighten the screws, so I used the following trick: I put a screw in through the side, and into a nut on the inside, then heated the nut with a soldering iron until it set into the plastic where the 3mm nut was supposed to sit. this worked well enough for me to get most of the nuts in place permanently. Don't do this without the screw in the nut, however, and don't remove the screw until the plastic has hardened again. not having the screw in place will probably block the hole (Happened once) and removing the screw too soon will get melted plastic in the way, making it difficult or impossible to thread in another screw. It will probably also foul the screw threads more or less permanently.
Category: 3D Printer AccessoriesTags
Model origin
The author marked this model as their own original creation. Imported from Thingiverse.