Calibration Jig
a small Holder for attaching a Digital Caliper to a printer using T-Nuts for calibrating axis steps
3
19
0
427
updated January 11, 2022
Description
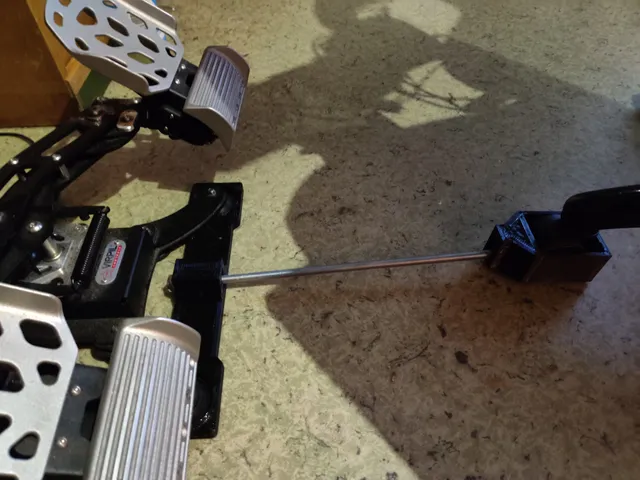
PDFA simple Holder to attach an Digital Caliper to your Printer, using T-Nuts
Printing Parameters:
Material: doesnt matter, used ABS+
Nozzle: 0.4
Layerheight: 0.2
Infil: 20%
BOM:
1x M5x20 Screw
2x M5 Washers
1x M5 Nut
2x M3x10 Screw
2x M3x12 Screw
2x T-Nut M3
2x M3x5,7 Heated insert
Assembly:
- Insert the Heated inserts into the 2 holes on the part Caliper-Mount
- Insert Caliper-Mount Hinge into Base Hinge
- Add 1 Washer on the M5 Screw, insert it into the hinge, add 2nd Washer and the Nut
- Insert Caliper into the Caliper-Mount (see picture) make sure to allow the longest possible movement for the Caliper
- Insert 2x M3x12 Screw into the 2 Holes in part Base, add T nut from the other Side
- Add Caliper-Mount-Top ontop the caliper and insert the 2x M3x10 Screws and tighten them, this will Sandwitch the Caliper into the mount.
Tags
Model origin
The author hasn't provided the model origin yet.