Filament Cutter v3 with Prusa Z-axis Mount
Description
PDFConvenient filament cutter, with many upgrades from several Thingiverse remixes. I use it every day! Blade is a standard 9mm from Amazon: https://amzn.to/3EkeHoP
Here are the key features:
- Filament port is curved, filament goes easily in like a funnel (even if it's got a nasty end)
- Filament path has a “stop” inside so that you feel a small resistance at the right insert depth
- Compartment catches small end that is cut off (so it doesn't go flying)
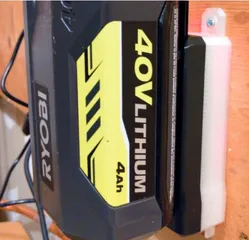
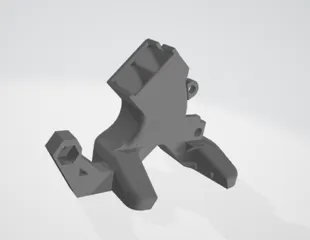
- Press fit whole setup to top of Z-axis rod mount (hexagonal opening is used). The cutter tool is flush with the MK3S(+) printer.
- If used without mount, has some small areas for magnets inside the compartment so that you could attach to anything else (like a refrigerator magnet)
- Exterior of mount has openings on each side allowing another “tool” holder to be fitted to it (the sky is the limit!)
- Parts slide and then press fit together, making it very convenient to use (and hand shaped)
- Small finger depression and rounded edges making it easy to hold (note: earlier versions were easy to misplace and had sharp edges.
- If you print the spring in a transparent filament, you can see the compartment and know when it's full.
- Small holes in mount can be used to place a tweezer holder, etc. More add ons to come…
Only the “spring-cutter” needs support; still trying to figure out a way to do it without supports (hopefully coming soon!). Standard 0.15mm layer height is OK. The only extra thing you need is the razor blade: 9mm blade as link above, cut to 19mm long blade portion (this is the length of the “unusable end” of the blade with the hole in it, but the length you need is slightly shorter than 4 blade “segments”. You can score the end of the cylinder to allow this 4 segment end to fit if you like.
Assembly:
- Insert the blade with the “hole end” in the spring-cutter piece with the blade pointing out (be careful!)
- Slide the spring-cutter piece into the channel of the core. You will have to bend the spring outwards slightly (not too much), to get it to slide past the compartment.
- Snap the core into the holder.
- Done!
Thingiverse source: https://www.thingiverse.com/thing:2973420
Tips appreciated if you like my modifications:
https://paypal.me/DrBryanShelton?country.x=US&locale.x=en_US
Tags
Model origin
The author hasn't provided the model origin yet.


