Turn your Prusa i3 mk2s into a pen plotter (+ pen holder)


Description
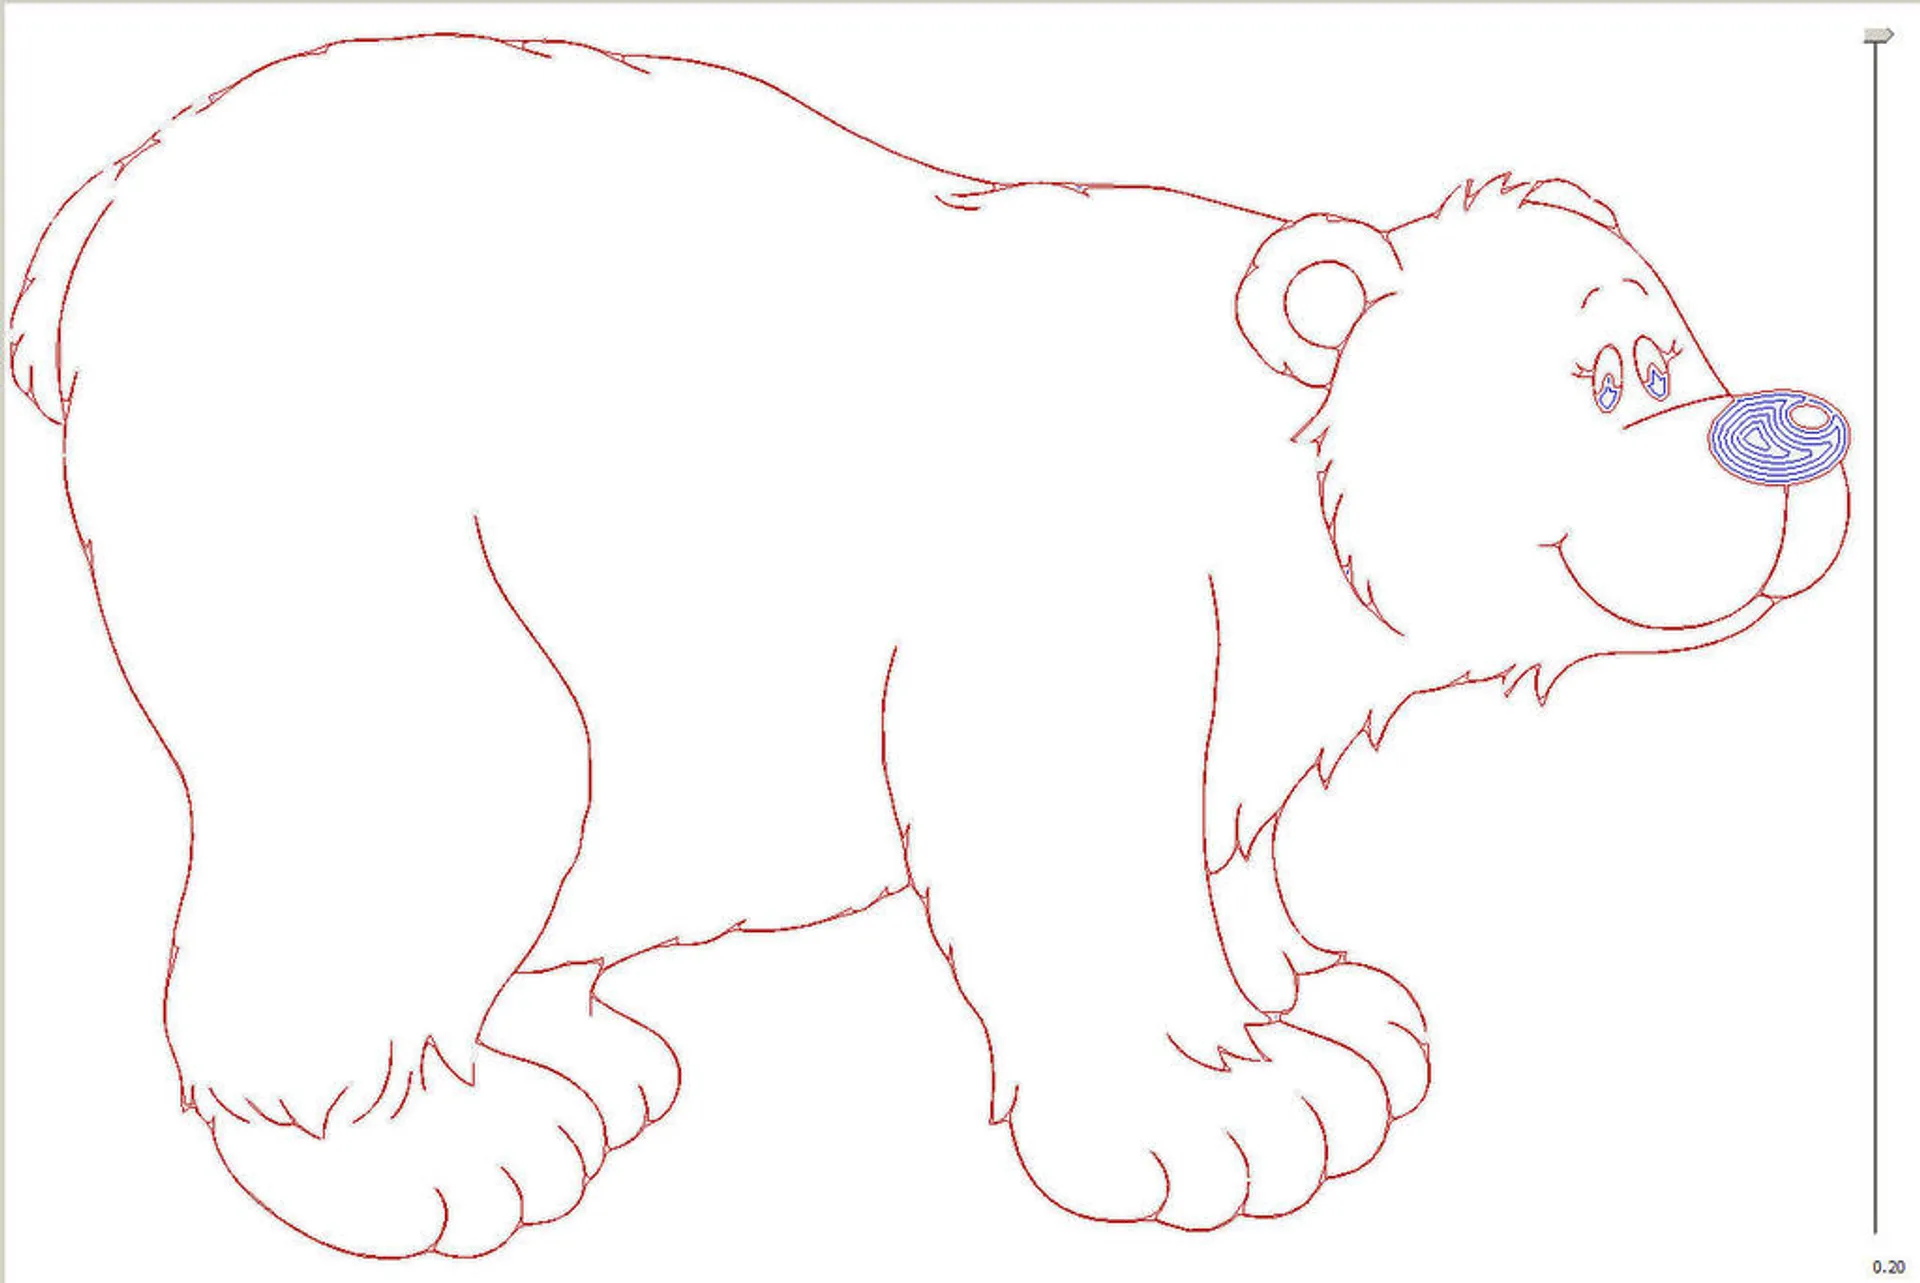
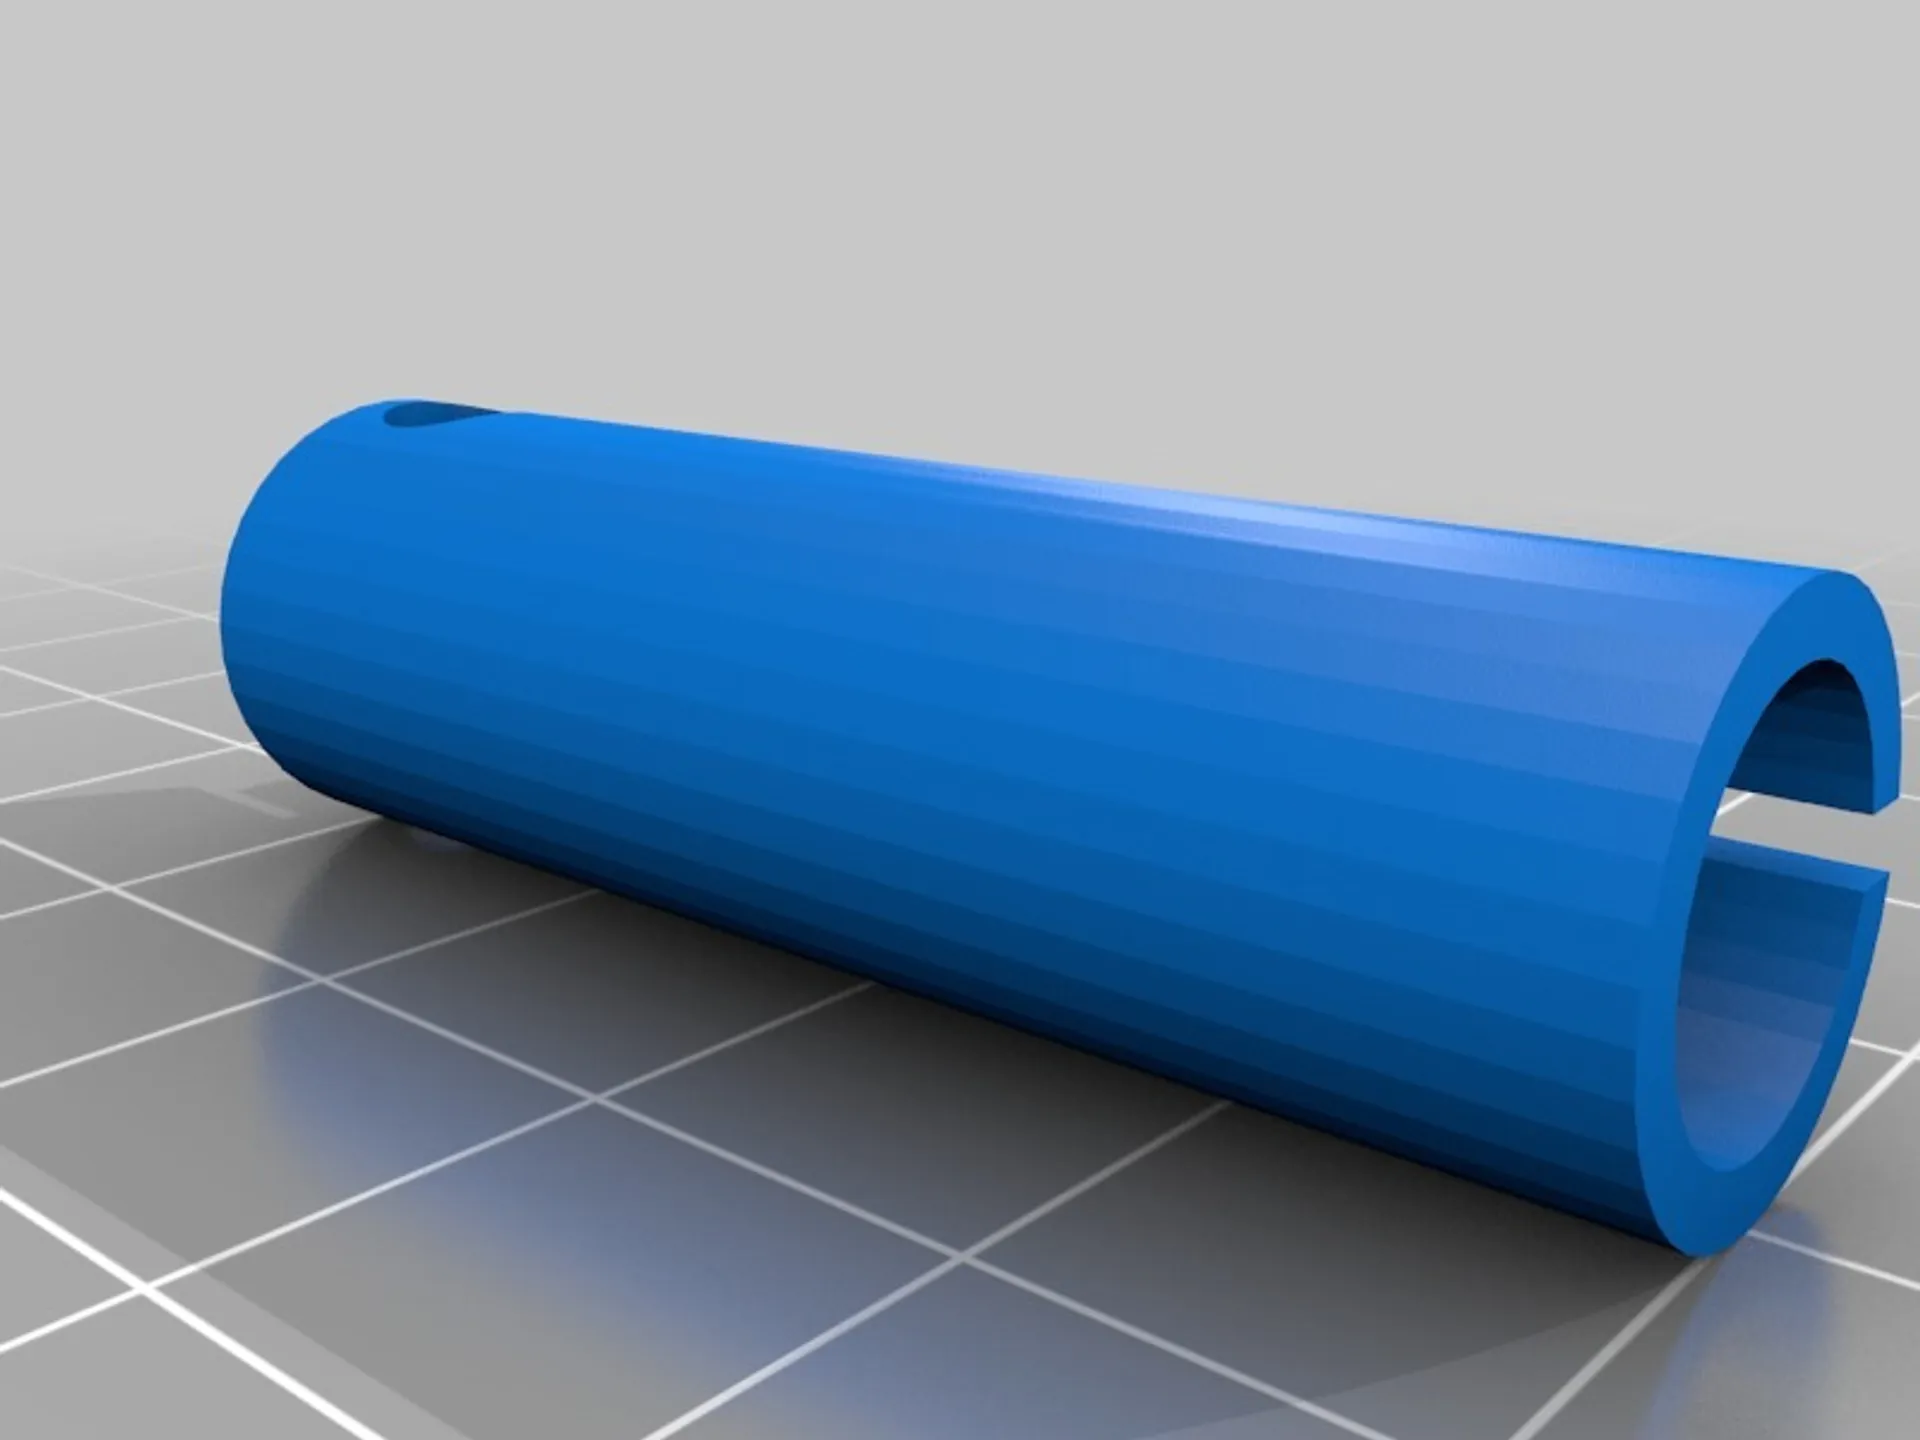
PDFThis is a simple penholder for your Prusa i3 mk2s printer.
It will convert it into a fully functional Pen plotter without disassembling anything.
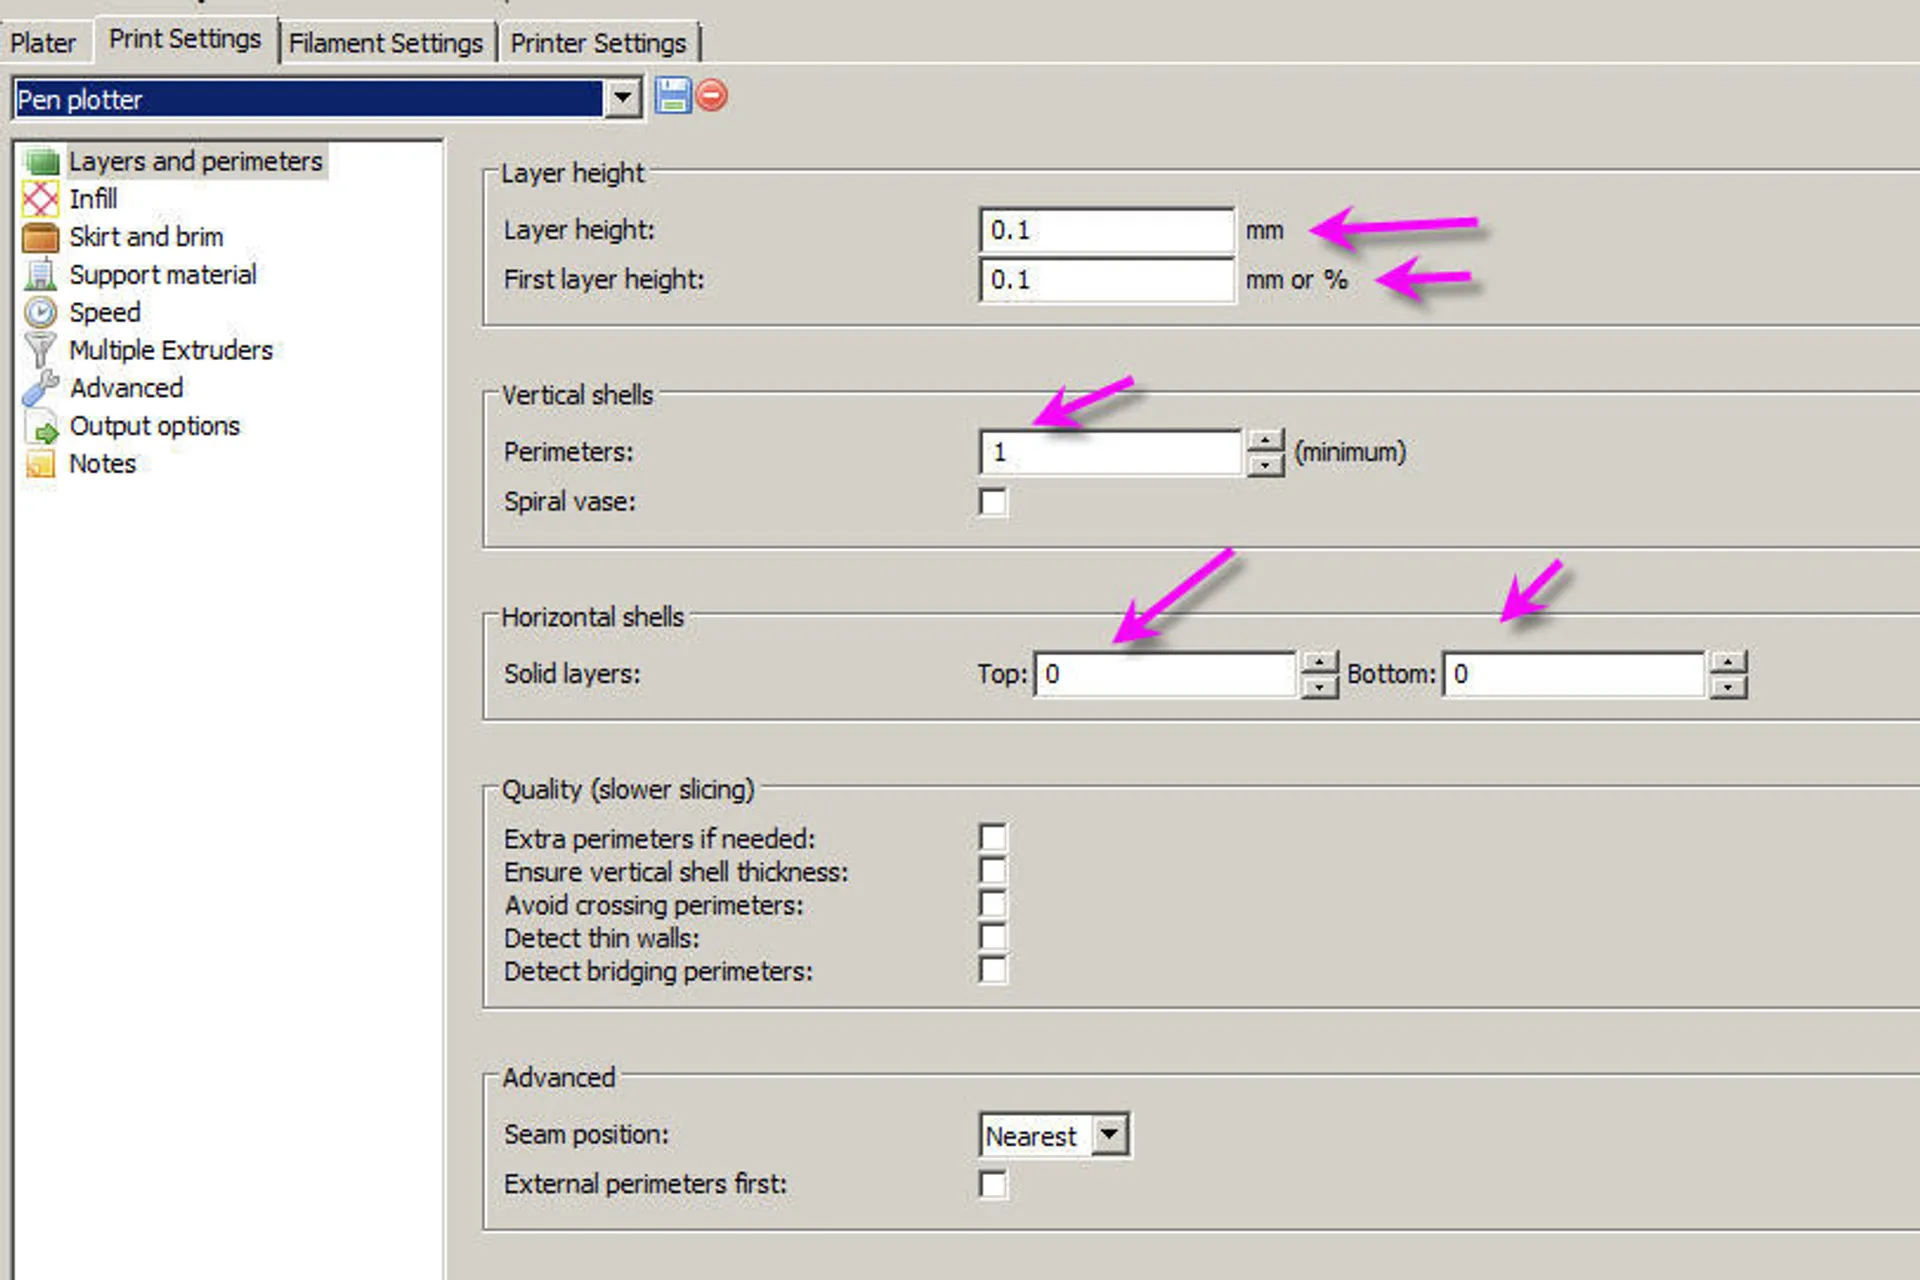
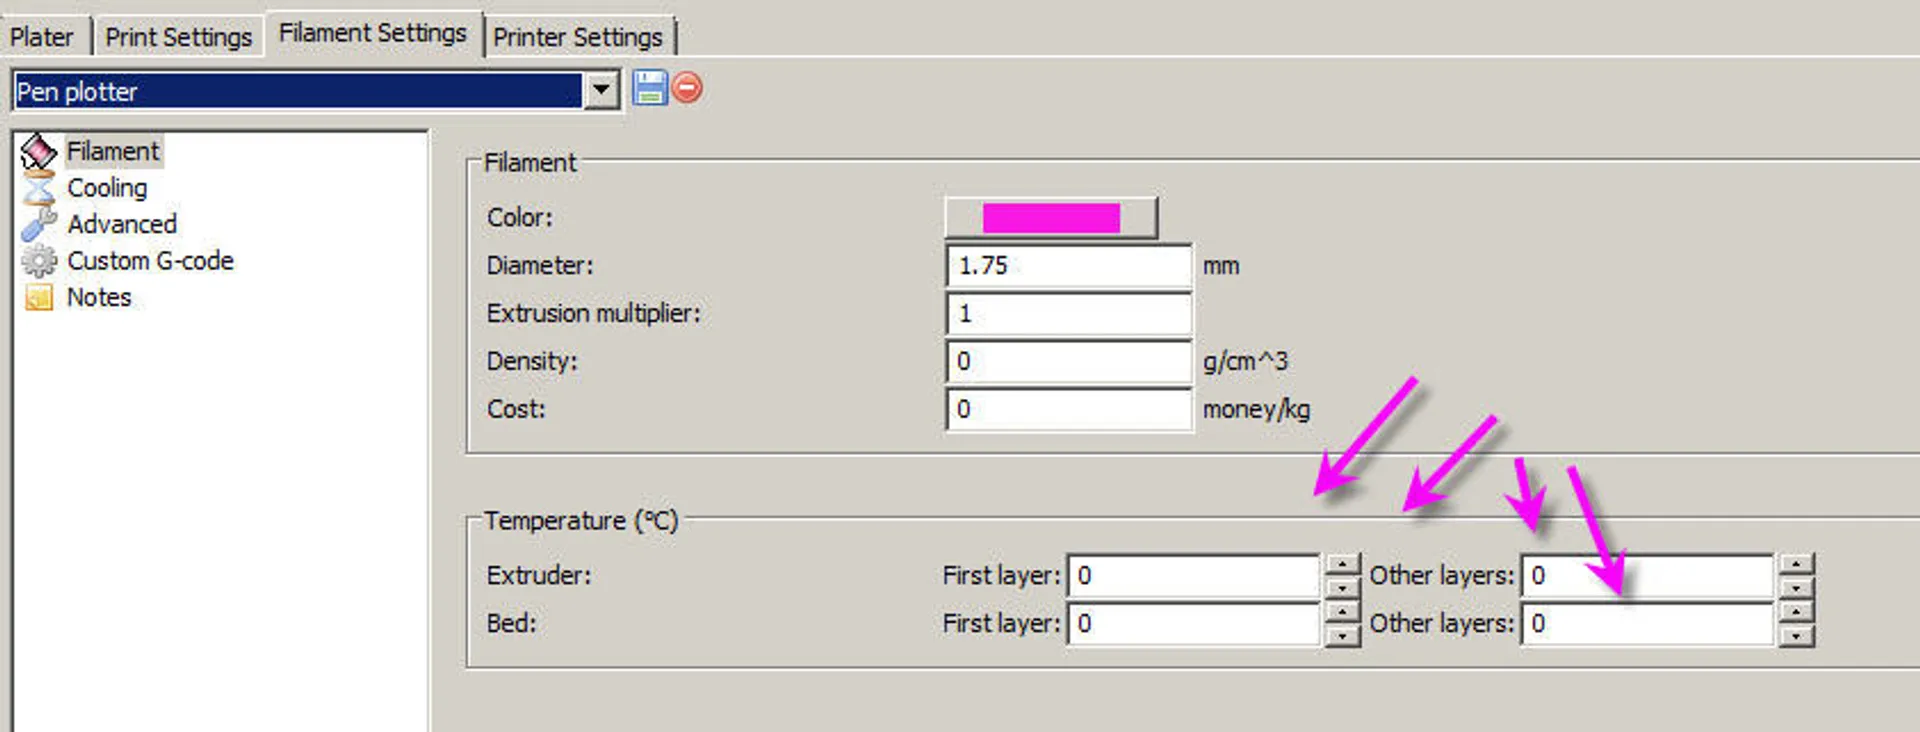
The Slic3r settings are given. (See the PenPloter_Slic3r_Config.ini and config_Bundle files)
Use it :
- launch the gcode
- when first beep, position the pen and the rubber band
30s later a second beep tells that printing will start That's it !
and details
Post-Printing
final setting
add 4mm screw which will "auto tap" into the pre drilled holes on the pen holder
add 2 nuts+screw to fix the holder on the extruder stepper motor
add a rubber band, one end on the filament spring screw, the other on the pen holder
position the pen and put the cap so that the tip touches the paper when z = 13.5mm (or modify the parameters into the slicer program...)
convert image or svg to stl
use on line tools such as :
svg : http://svg2stl.com/
svg : http://3dp.rocks/lithophane/ (flat model, positive image)
bitmap : 2D image to STL : https://www.thingiverse.com/thing:66115
Now you have a stl file
Slic3r configuration and settings
see images into the "thing files".
You will need :
- cut the stl to only keep one layer
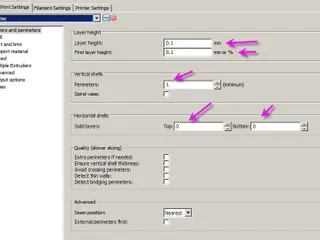
- set the PrintSettings with only 0.1mm layer, one single layer, no bottom/top layer, one perimeter
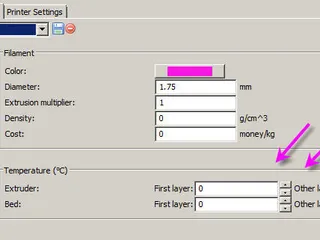
- set the filament to cut all temperature (bed and extruder to 0°C)
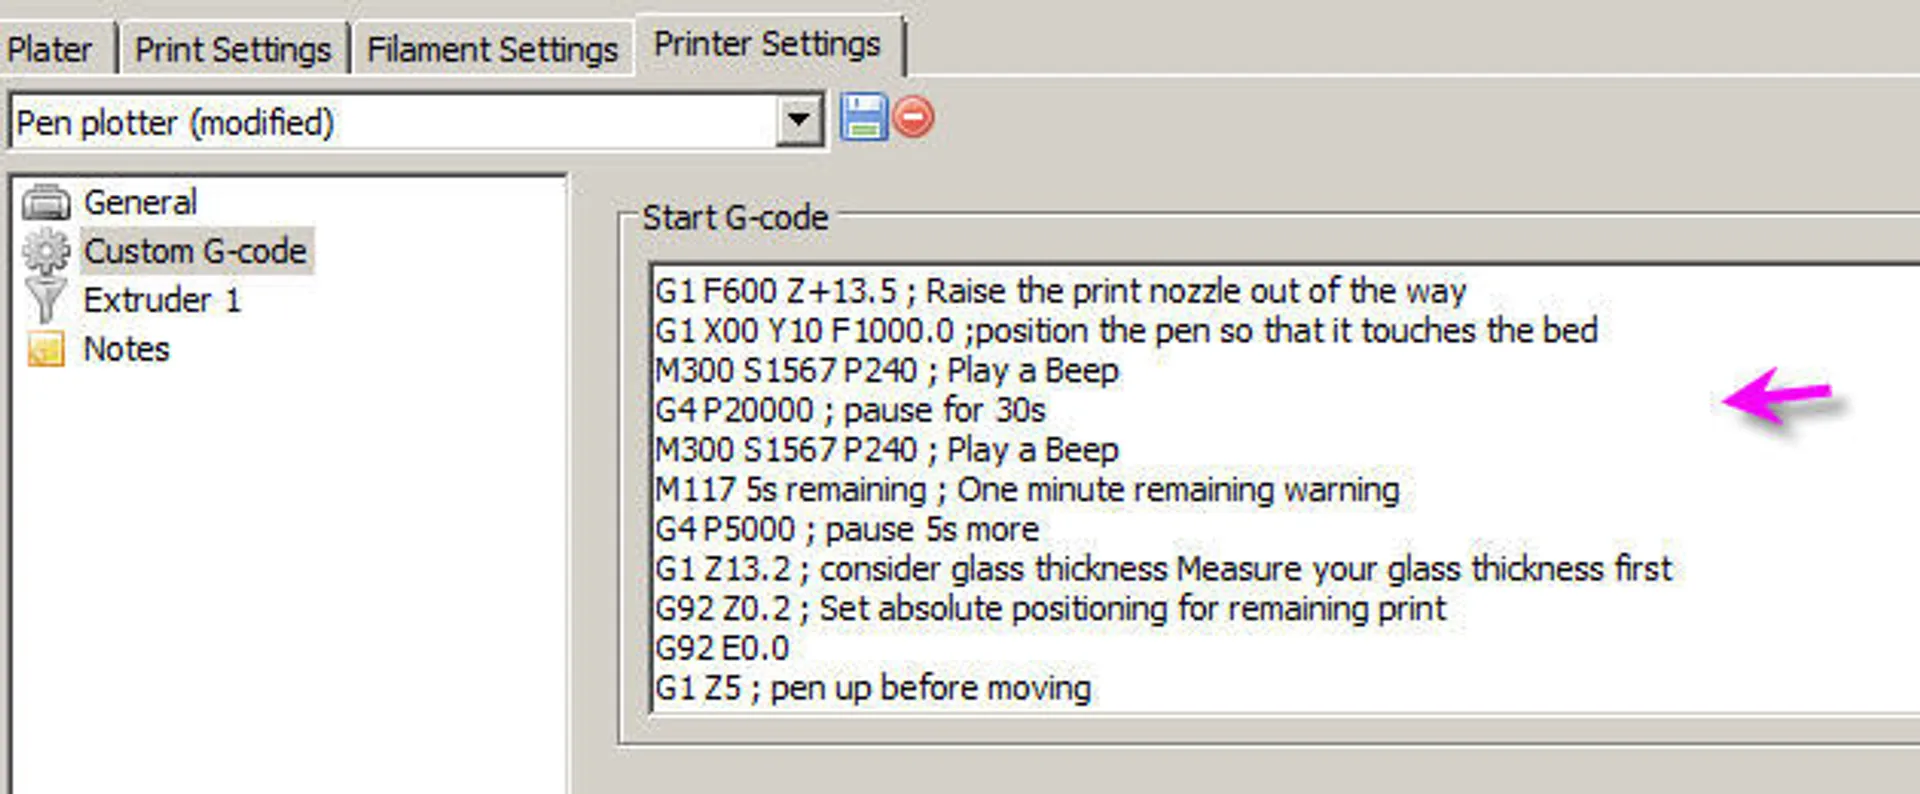
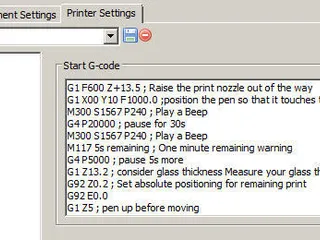
set the Printer Settings into the Start G-Code section --> IMPORTANT TO DO IT
and add these lines : M115 U3.1.0 ; tell printer latest fw versionG28 W ; home all without mesh bed level
M104 S0 ; turn off temperature
M140 S0 ; turn off heatbedG1 F600 Z+13.5 ; Raise the print nozzle out of the way
G1 X00 Y10 F1000.0 ;position the pen so that it touches the bed
M300 S1567 P240 ; Play a Beep
G4 P20000 ; pause for 30s
M300 S1567 P240 ; Play a Beep
M117 5s remaining ; One minute remaining warning
G4 P5000 ; pause 5s more
G1 Z13.2 ; goes down 0.3mm pen can write now
G92 Z0.2 ; Set absolute positioning for remaining print
G92 E0.0
G1 Z5 ; pen up before movingIn this example, the pen is positonned so that the tip touches the paper when Z is 13.5mm.
Move the top cover to achieve this
then this gcode goes down 0.3mm and fixes the first layer absolute position
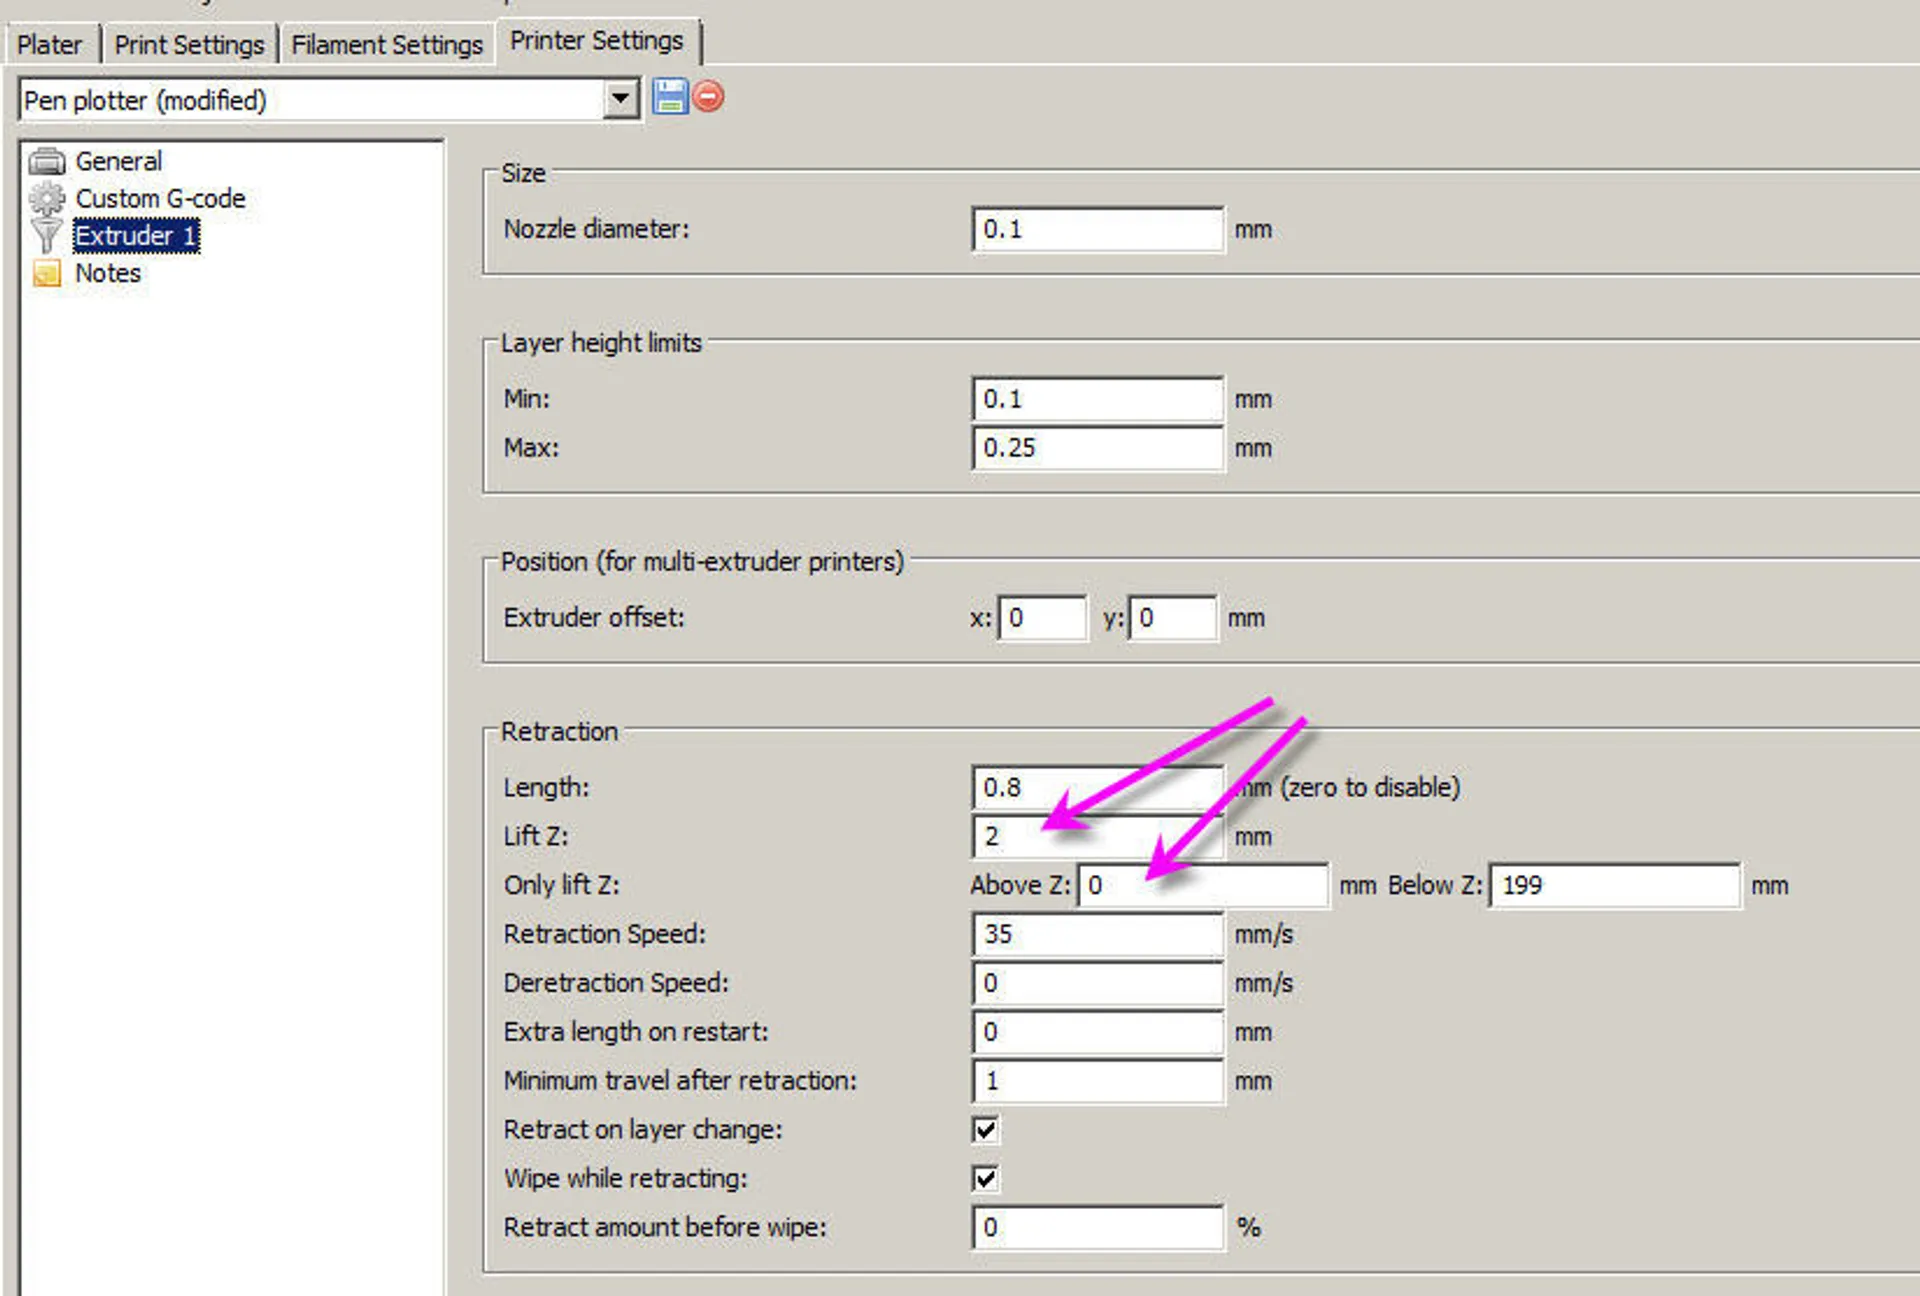
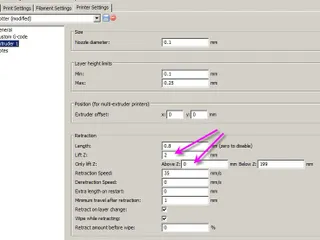
When the printer will print it it will go to 0.1 (or 0.2) mm height, the pen will touch sligthly the paper and he ruber band will press it down gently.Now another important parameter is to tell the printer to retract 2mm in Z for "pen up". This is done into the Extruder Setting tab.
Tags
Model origin
The author marked this model as their own original creation. Imported from Thingiverse.


