Lockable Side Drawers for Prusa MK3/MK4 (logo MK3 and MK4)


Description
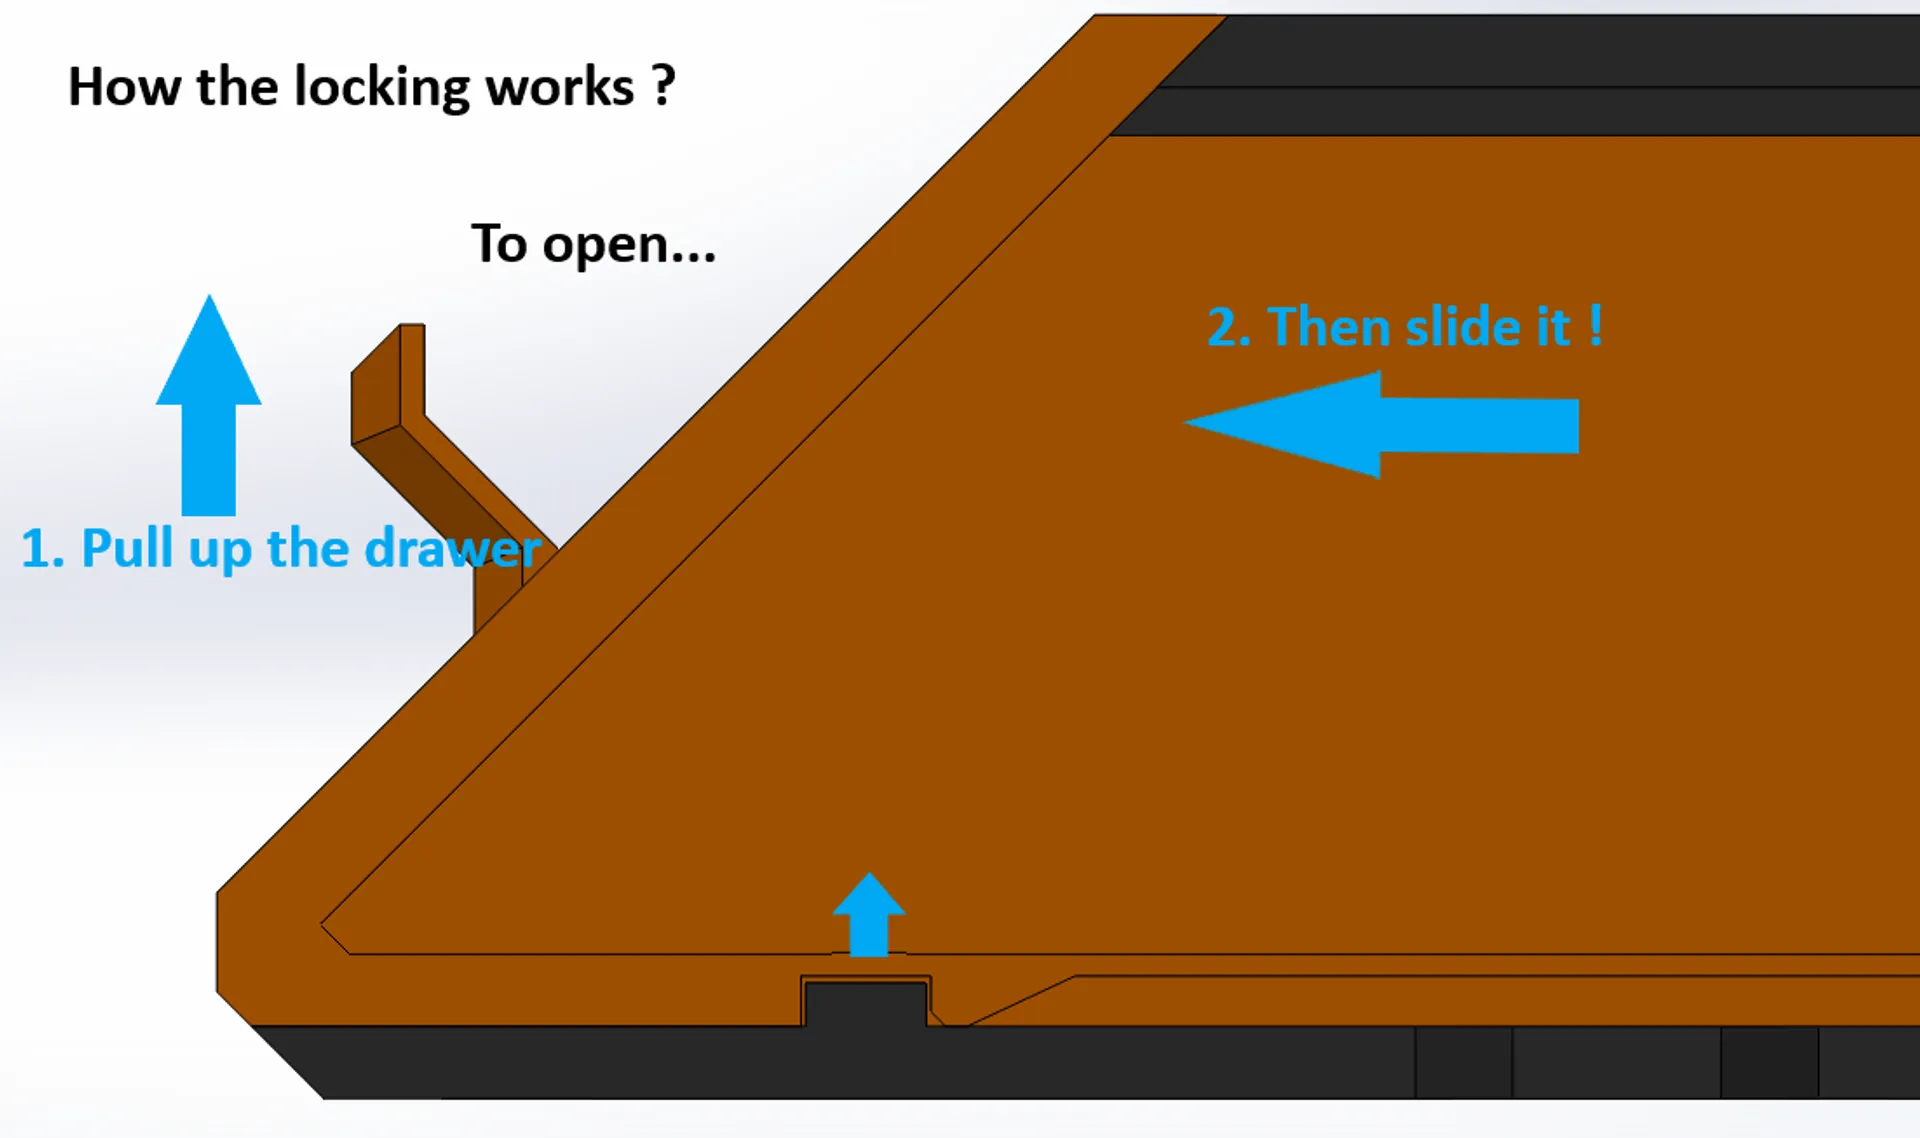
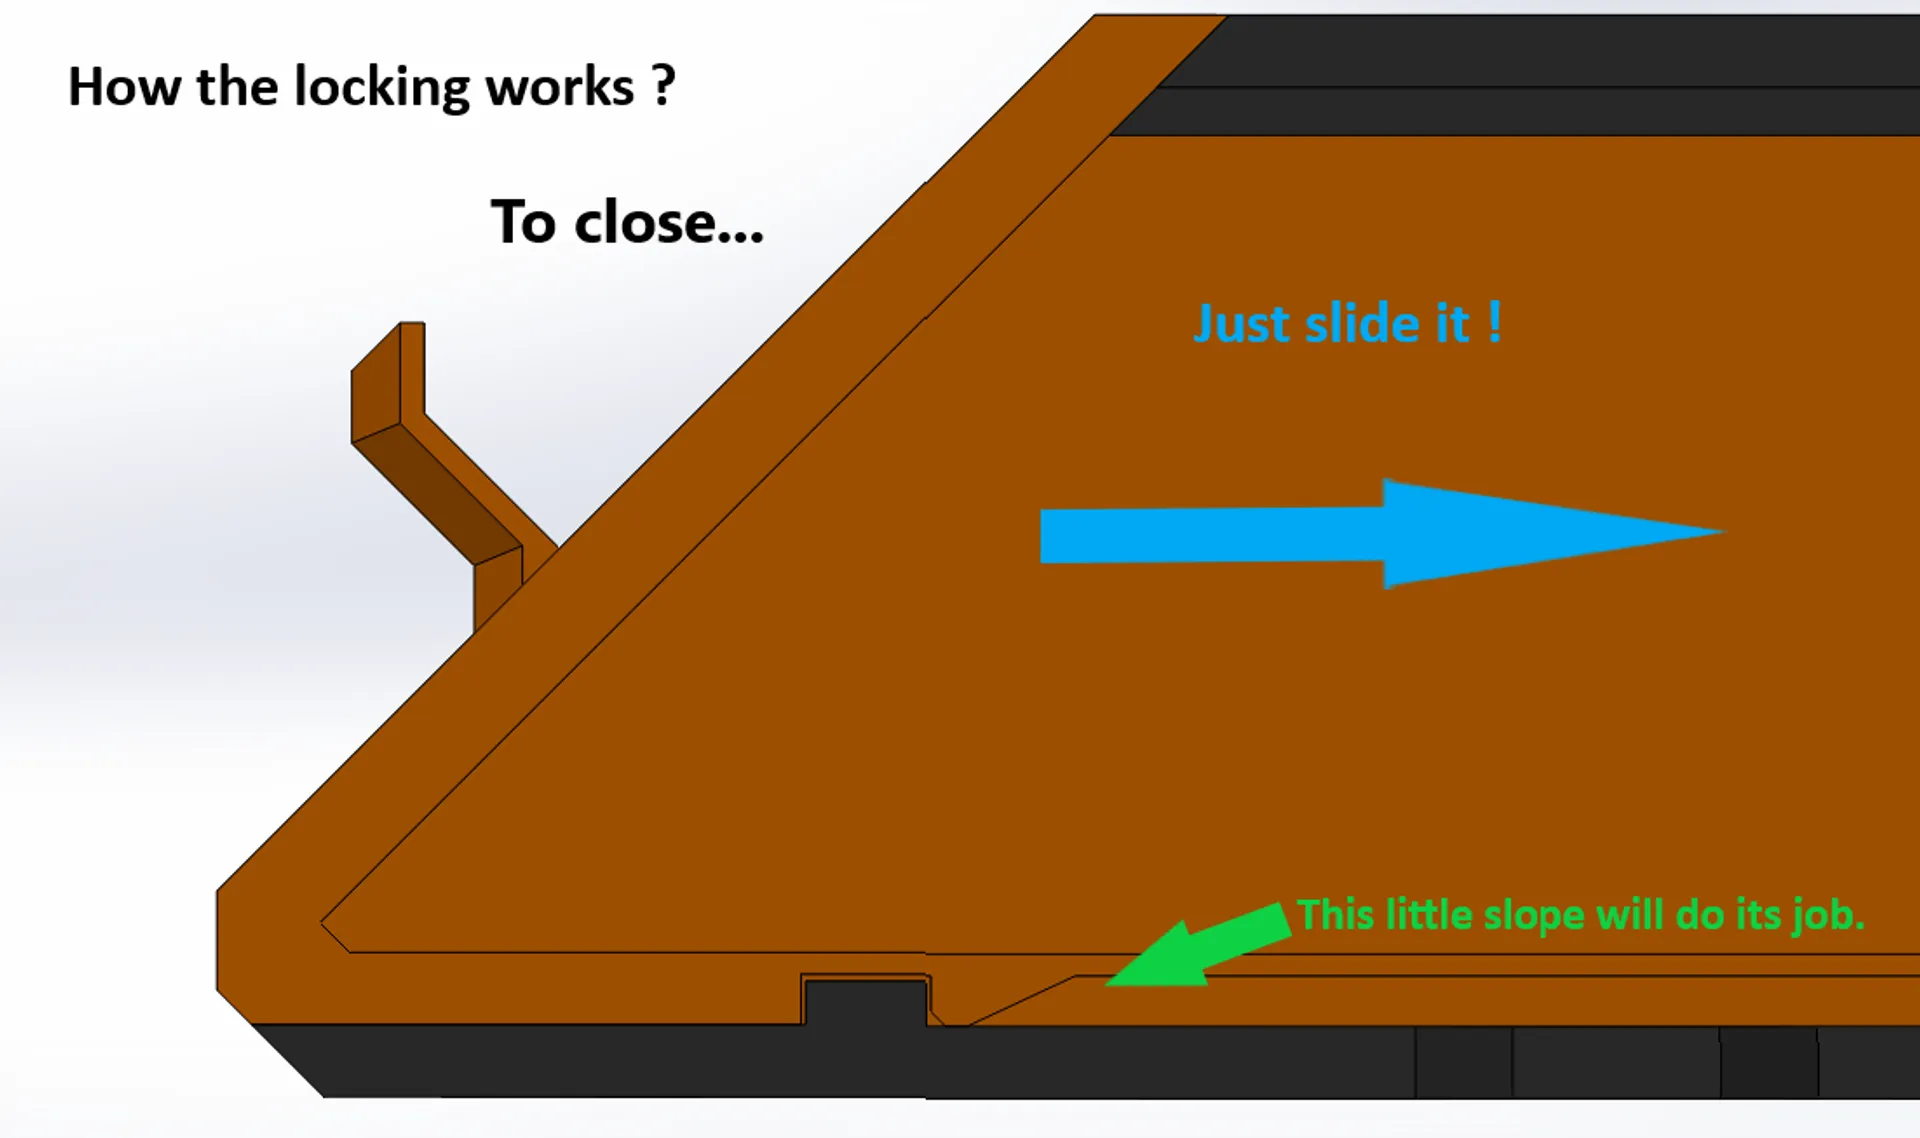
PDFrocBased on the excellent work of "djedje_zr7", my remix mainly provides a "locking" feature to the drawers and some minor improvements.
All modifications and improvements from original design:
- “Locking” feature for the drawers. Now, they stay closed when you move your printer ;)
- More regular/symmetrical hexagonal pattern for the boxes.
- No feet and locking tabs embedded in the new box design for the locking feature.
- Drawers are plain (no hexagonal pattern)
- Drawers has been purified to get a more “streamlined style" (personal taste).
- Cover with MK4 logo available.
| Version | Description | Date |
|---|---|---|
| A.1 | Initial Release | 09/07/2021 |
| A.2 | Add missing counterbores in “shortbox_right” files. Thx Lumbi. | 11/07/2021 |
| A.3 | Add 3mm of thickness externally at the holes locations of the long boxes to avoid bowing/skewing due to the width of the printer front plate. Thx ChiTownGuy for the remark. | 16/06/2023 |
| A.4 | Add covers with MK4 logo. Thx ChiTownGuy for the idea. | 21/06/2023 |
| A.5 | Add maintenance procedure. Thx Jan_Tschään. | 29/10/2023 |
Printing Instructions
- Drawers
- PETG for stiffness.
- Layer Height: 0,3 mm (0,2 mm for the first layer).
- 2 Perimeters.
- Detect Bridging Perimeters.
- Brim width: 7 mm.
- No supports for the long drawers.
- Add enforced support under the flat handle for the short drawers.
- User variable layer height to improve the accuracy of the slope in the locking grooves (0,2 mm or less).
- Boxes
- PETG for stiffness.
- Layer Height: 0,3 mm (0,2 mm for the first layer).
- 2 Perimeters.
- Detect Bridging Perimeters.
- No supports.
Maintenance Procedure
Imagine you want to remove the drawers for cleaning ? How to do it as one of the screw is hidden even when pulling out the sliding part (the drawer itself) ?
Easy:
- Fully pull out the sliding part (the drawer itself).
- Push up the sliding part against the cover while keeping it horizontally.
- Pull, that's it !
Why? Because as you can see in the next picture, when the drawer is against the cover, it will slide just above the stops.
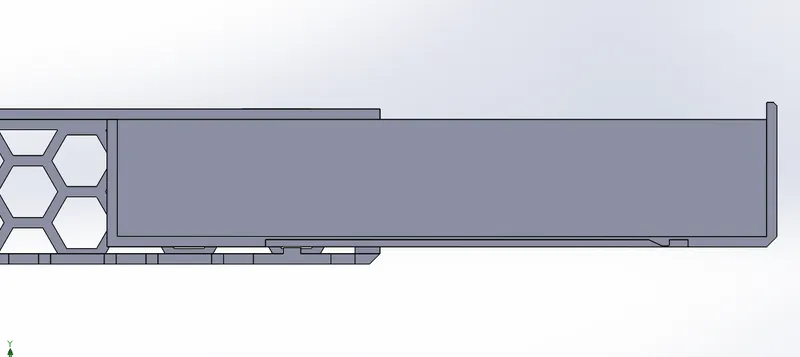
To mount it again, just push slide it against the cover and then let it go.
Notes
- All covers provided by "djedje_zr7" are still compatible.
Have a nice print !
Last note! I've spent quite a lot of time designing, iterating and prototyping on all my models. Therefore, if you enjoy them, please don't forget to like+download and then rate them, so that I can earn so prusaments to continue ;)
Tags
Model origin
The author remixed this model.

Differences of the remix compared to the original
- Locking” feature for the drawers. Now, they stay closed when you move your printer ;)
- More regular/symmetrical hexagonal pattern for the boxes.
- No feet and locking tabs embedded in the new box design for the locking feature.
- Drawers are plain (no hexagonal pattern)
- Drawers has been purified to get a more “streamlined style" (personal taste).
- Cover with MK4 logo available.