Ultimate Prusa Casing
Description
PDFDescription:
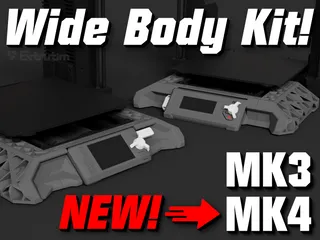
After hours and hours of watching the printer printing, you've got bored with the Design of your Prusa?
Give it a new look with the Ultimate Prusa Casing!
I had these side boxes before, but never put anything in there because something was always rattling. I liked the wider look of the printer though, so that's how I designed this case.
5 parts plus an alternative display cover and various other upgrade parts. More upgrade parts coming soon. So make sure you don't miss a thing! You'll find them under the "Remixes" tab.
I recommend using a matte filament. I printed mine from a matte black PLA. 0,2mm Layerheight and 5% infill in the honeycomb area of the side panels to save time.
The display cover is optional and does not necessarily have to be changed.
I added inlays for the LCD cover. These can be printed and inserted without an MMU. If you have an MMU, you can find an MMU version of the display cover under the Remixes tab. The honeycomb pattern is a little wider there.
Hold up!
You will need some stuff...
- 4x M3x12
- 7x M3x round about 10mm
- 4x M3 nylocknutt
- 4x M3 T-Nut, click here to Download
- optional BasePlate <-- watch instruktions: click here
- Button and Y-rod holder are part of the new MK3s + printable parts: click here
Instructions:
The assembly is pretty easy. First change the display cover. Then work your way from the middle parts to the outer parts. The only contact points to the printer are the two side parts which are attached with the T-nuts. In this way there should be no disturbing vibrations.
Also take a look at the "Remixes" tab, where you can find some add-ons for the casing!
If you have any problems, questions or ideas please let me know. I will respond as soon as possible.
I would be very happy about a like or a rating if you like my project! Also take a look at my other Designs!
Maybe you want to join my club for a month, about this tip I would be very happy because it helps me to finance my hobby to create models!
Changelog:
- Added a MMU version of the display cover
- Added Beam with Prusa Printers logo
- Small adjustments to the print files
- Added a color upgrade for the side parts
- Added a symmetric version of the casing
- Added an alternative version of the SD card handle
- Added honeycomb inlays (Click here for a MMU Version)
- Added a V6 nozzle holder
- Added a Revo nozzle holder
- Added additional grid for the YZ Case from Carter
- Added Beam with Printables logo
Print instructions
I recommend matt black filament.
Print the parts as they are aligned in the package.stl.
- 0,2mm height
- print it slow, row by row
- Honeycomb side parts, infill over 12mm height: 5%
- no supports needed
The assembly is pretty easy. First you change the display cover. Then you work your way from the middle parts to the outer parts. The only contact points to the printer are the two side parts which are attached with the T-nuts. In this way there should be no disturbing vibrations.
| Note: Since the question came up recently, the license states that you may not use this model commercially. For me it's ok if you show the photos or the model to your audience, even if you make money with it as long as you name me as the creator and link to this page. You are not allowed to sell the files or the printed model itself. |
Tags
Model origin
The author marked this model as their own original creation.


