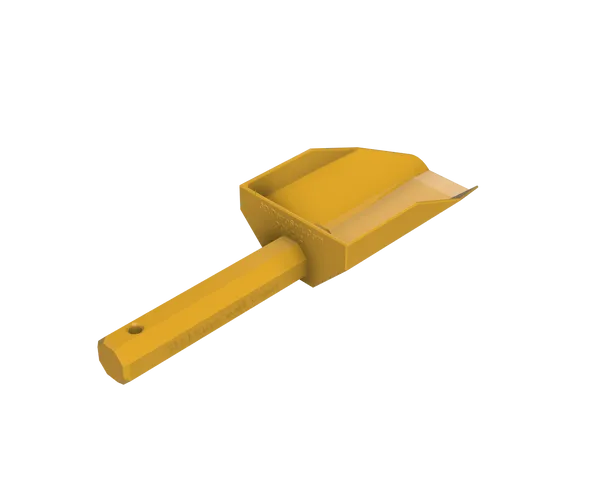
K280 Parts Cooling Fan Mount U-Shroud

Description
PDFA 3D Printable light, durable and efficient U-Shroud Parts Cooling Fan Mount for the He3D K280 Mega Delta, Kossel or other similar RepRap 3D Printers, built with 20mm slotted extrusions. The design provides adequate cooling of the part with minimal impact on the nozzle and no interference with the full travel of the effector. It is designed to mount an ultra-thin 24-volt 40mm square blower fan, behind the cooling block of the hot-end, with M2 screws in threaded holes at each corner of the mount. Further, the design used the four-existing threaded M3 holes in the cooling block itself to mount the assembly.
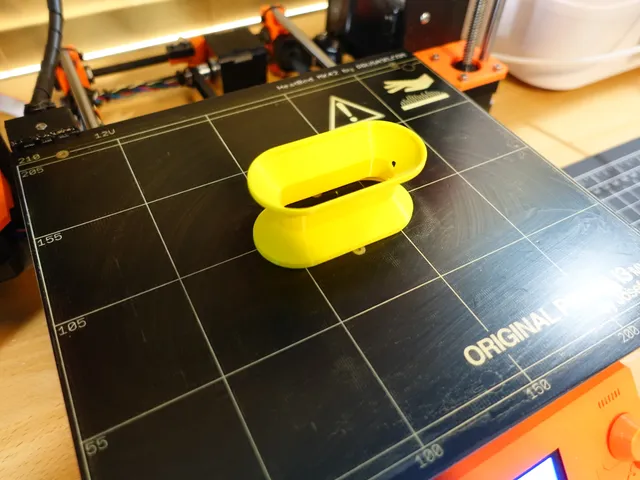
The part can be easily 3D printed, without any support, on a modern inexpensive 3D Printer. It can be printed with a variety of materials, including PETG, ABS, ASA and many other types of heat tolerant printable materials.
ABS works very well for this application. Alternately, PETG should be almost as good, but I have not tested it.
I strongly recommend against using PLA to make this object because it will be exposed to high temperature exceeding ~55 C (~ 130 F), during normal operation of your 3D printer. At such temperature, PLA will most likely warp.
I have been using this parts cooling fan assembly on my K280 since early 2018 without any issues.
- Layer Hight: .150 ~.160 mm, depending on motors and gearing
- 3 perimeters or shells (1.2 ~ 1.5 mm) minimum - 4 perimeters prefered
- 8 bottom layers (1.2 ~ 1.3 mm) minimum - 12 bottom layers prefered
- 8 top layers (1.2 ~ 1.3 mm) minimum - 12 top layers prefered
- Infill ~15% ~ 20%, depending on infill type
- Enable “Draft Shield” in the slicer settings
Additional items needed for assembly
- 4 x Countersunk Head Screws M3x8 (or M3x10 if they are available in your area)
- 4 x Socket Cap Screws M2x12 (Optional: Pan Head or Button Head M2x12)
- 1 x Ultra-thin 24-volt 40mm Square Blower Fan
- Optional: 4 x M2 Nuts
- Optional: Thread locking compound.
Assembly Instructions
Prepare the printer’s wiring for the fan. Polarity is critical.
Attach the fan shroud assembly to the back of the hot-end cooling block with the 4 Countersunk M3x8 screws. Orient the U-Shroud so it wraps around 3 sides of the nozzle just above the tip. Apply just enough torque to secure the parts snugly together - DO NOT OVERTIGHTENT!
If you are concerned that the M3 screws could come loose during operation, feel free to apply tread locking compound before installing them.
Seat the Ultra-thin 24-volts 40mm square blower fan around the shroud’s air duck. The fan must be seated all the way down so that the mounting holes align with the retaining holes on the fan. The part is designed for a snug fit with minimal air leakage between the fan and the air duck.
Secure the fan to the shroud using the 4 M2x12 screws. Note that the M2 holes in the shroud are threaded. Apply just enough torque to fully seat the M2 screws. Only minimal tightness is necessary to make sure that they are not loose. The M2 screws’ function is to prevent the fan from coming out from the air duck. - DO NOT OVERTIGHTENT!
Optional: Use M2 nuts on the other side of the shroud to secure the screws.
Note: The K280 kit is a 24-volt system. Many other kits are 12-volt system instead. If so, replace the 24-volt fan with a 12-volt unit.
Thank you for viewing this object!
If you like it, please click on the “like” button. It will help focus my efforts on additional items that you care about.
If not, please leave a comment and let me know how I could do better. Constructive criticism is always appreciated.
In any case, I would love to hear from you.
Please feel free to visit my store on My Mini Factory to view the other objects that I designed:
https://www.myminifactory.com/users/DanoSoft
Tags
Model origin
The author hasn't provided the model origin yet.